

The Role of Accident Photos in Your Claim
Accident photos are the single most decisive form of evidence you can collect after a collision, outweighing witness statements and verbal accounts in both insurance and legal proceedings. The term used in professional and legal contexts is “photographic evidence” or “accident scene documentation,” but whatever you call it, the role of accident photos is the same: to create an objective, timestamped visual record that proves what happened, who caused it, and what it cost you. Most people grab their phone at the scene and take a few shots without a plan. That instinct is right. The execution, however, is almost always incomplete, and that gap can cost you thousands of dollars in your settlement.
What role do accident photos actually play in your claim?
Photographic evidence is the foundation of any credible insurance claim or personal injury case. Photos are often the single most decisive evidence in collision claims, more persuasive than what any witness says or what either driver remembers. That matters because memory is unreliable, witnesses disappear, and insurance adjusters are trained to find gaps in your story.
The role of accident photos extends across three distinct functions. First, they establish the facts of the scene: vehicle positions, road conditions, traffic controls, and environmental factors like rain or poor lighting. Second, they document the extent of damage to your vehicle and any injuries to your body. Third, they create a timestamped record that anchors your claim to a specific moment in time, making it far harder for an insurer to argue that damage occurred elsewhere or that your injuries developed later.
Insurance adjusters at companies like State Farm, GEICO, and Allstate use photos to verify repair estimates and assess liability before a single dollar is paid out. Without strong visual documentation, your claim depends entirely on your word against the other driver’s. With it, you hand the adjuster objective proof that does the arguing for you.
The importance of accident images also extends to legal proceedings. If your case moves to litigation, your attorney uses those same photos to reconstruct the accident, establish fault, and demonstrate the severity of your injuries to a judge or jury. A photo taken at the scene in the first five minutes after impact carries more weight than any expert testimony reconstructed months later.
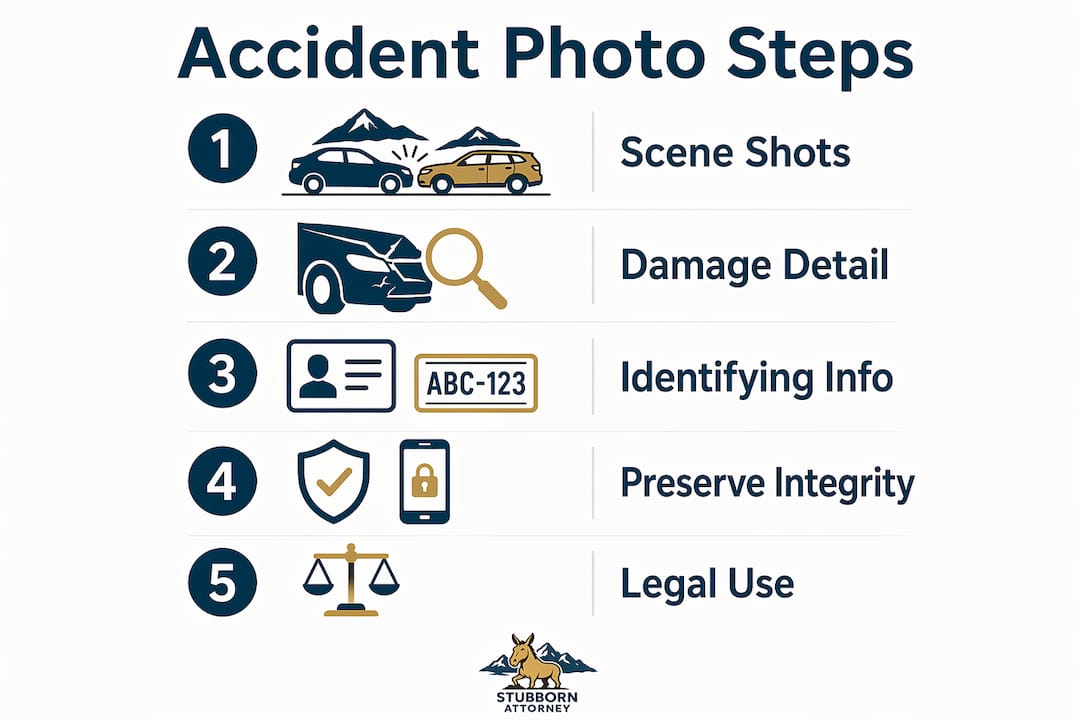
What types of accident photos should you take?
A structured set of 15 to 25 photos covering the scene, vehicle damage at multiple distances, and identifying information is the professional standard for insurance claims. That range is not arbitrary. Fewer than 15 photos typically leaves gaps that adjusters and opposing attorneys will exploit. More than 25 is fine, but the categories below define what you actually need.
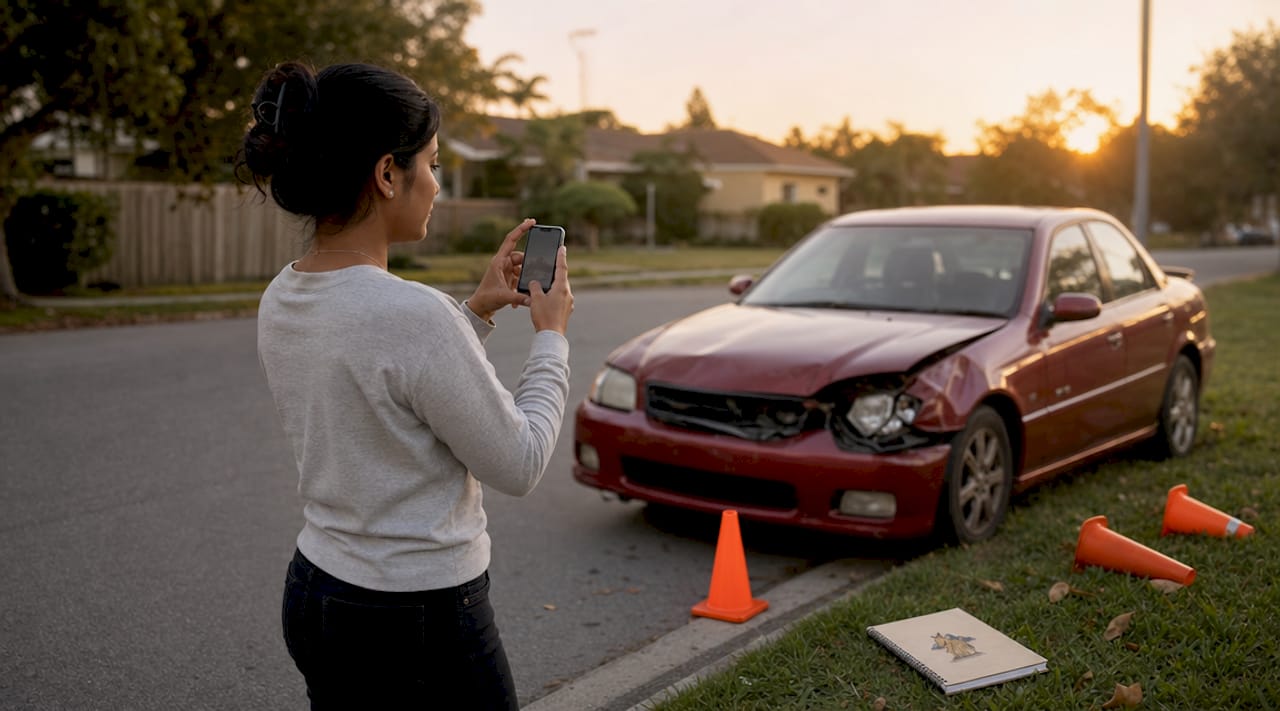
Scene documentation
Start wide before you do anything else. Capture the full accident scene from multiple directions before any vehicles are moved. Photographing the scene immediately before vehicles are repositioned preserves positional evidence that supports accident reconstruction and liability assessment. Once a car moves six feet, that evidence is gone forever.
Your scene shots should include:
- The overall position of both vehicles relative to each other and to the road
- Traffic signs, signals, lane markings, and any posted speed limits
- Road surface conditions: wet pavement, ice, gravel, potholes, or debris
- Skid marks, fluid spills, or broken glass on the road
- Surrounding context like intersections, driveways, or construction zones
- Lighting conditions, especially if the accident occurred at dawn, dusk, or night
Aim for 3 to 5 wide scene shots from different vantage points. Walk around the entire scene, not just the area directly around your car.
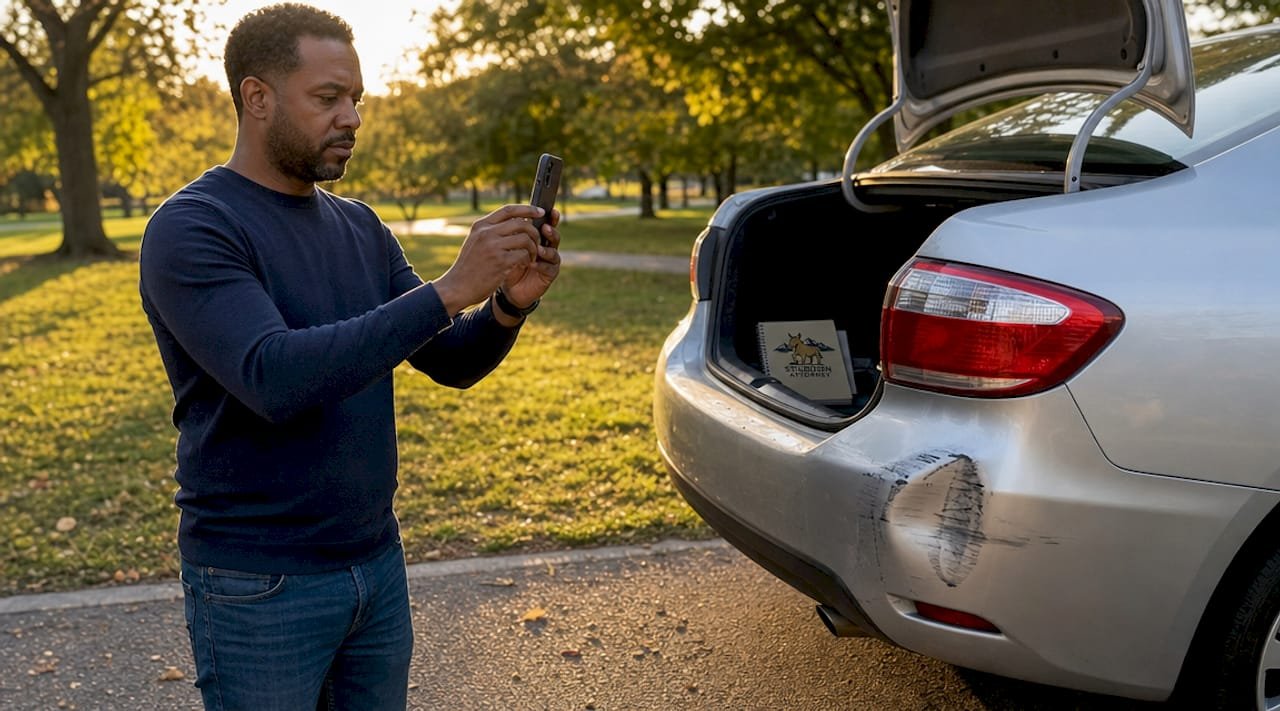
Vehicle damage documentation
Multiple photos from different angles and distances reduce any doubt about the authenticity and completeness of your damage record. For each damaged area of your vehicle, take three shots: one wide, one mid-range, and one close-up. This three-tier approach gives the adjuster everything needed to produce an accurate repair estimate without a physical inspection.
Your vehicle damage set should cover:
- All four sides of your vehicle, even panels that appear undamaged
- Close-ups of every dent, scrape, crack, or broken component
- Undercarriage damage if visible and safe to photograph
- Interior damage including deployed airbags, cracked dashboards, or broken glass
- The other vehicle’s damage from the same three-distance approach
Pro Tip: Photograph your odometer and dashboard warning lights immediately after the accident. Warning lights that appear after impact, such as airbag or check engine indicators, are powerful evidence of mechanical damage that may not be visible externally.
Identifying information
Document the other vehicle’s license plate, make, model, and color. If you can safely do so, photograph the VIN on the dashboard through the windshield. Capture the other driver’s insurance card and license as well. These photos protect you if the other party later disputes their involvement or if their insurer claims the vehicle was not present at the scene.
How accident photos help with insurance claims and legal evidence
The benefits of accident images go well beyond proving your car was damaged. Visual evidence directly influences how adjusters calculate payouts, how attorneys build liability arguments, and how courts assess credibility.
In the insurance context, photos support damage verification and give adjusters the data they need to authorize repair estimates without requiring a physical inspection. This speeds up the claims process and reduces the chance that damage is undervalued. When an adjuster can see three angles of a crumpled quarter panel, they cannot reasonably argue the repair costs less than the body shop quoted.
Injury photos alongside property damage photos provide crucial visual evidence that supports injury claims and settlement negotiations. Photographs of bruising, lacerations, swelling, or visible trauma taken in the hours and days after the accident establish the physical reality of your injuries. Insurance companies routinely dispute soft-tissue injuries because they do not show up on imaging. Visible injury photos fill that gap.
Timestamps and metadata embedded in your photos serve a specific defensive function. EXIF and timestamp data establish when damage occurred and help prevent staged or delayed claim allegations. If an insurer tries to argue that your damage happened in a separate incident, a photo with a GPS-tagged timestamp taken at the scene minutes after impact dismantles that argument immediately.
“Photos taken at the scene before any vehicles are moved or repairs are made carry the highest evidentiary weight. They represent the accident as it actually happened, not as anyone remembers it.”
The benefits of accident documentation in legal proceedings are equally significant. Personal injury attorneys use scene photos to establish the sequence of events, identify contributing factors like obscured signage or road defects, and demonstrate the severity of impact. In Colorado, where comparative fault rules apply, photos that clearly show the other driver’s position and the road conditions at the time of impact can be the difference between a full recovery and a reduced settlement.
For a broader look at what evidence matters most in Colorado accident cases, the evidence guide for Colorado Springs from Stubbornattorney breaks down how photos fit into the full evidentiary picture.
How to maintain the digital integrity of your accident photos
Taking the photos is only half the job. Preserving their authenticity is what makes them admissible and credible when it counts. Digital evidence integrity is a formal discipline, and the same principles that apply in criminal investigations apply to your accident photos.
ISO/IEC 27037 defines the quality principles for digital evidence acquisition and preservation: auditability, repeatability, reproducibility, and justifiability. Following these principles gives your photos strong probative value in legal proceedings. You do not need to memorize the standard, but you do need to follow its core logic: do not alter the original files, document who has access to them, and store them securely.
Here is what that looks like in practice:
- Save original photos directly from your phone to a secure cloud service like Google Photos or iCloud immediately after the accident
- Never edit, crop, filter, or compress the original files. Altering or compressing photos removes metadata and reduces their evidentiary reliability in court and with insurers
- Create a backup copy on a separate device or external drive
- Note the time, date, and location of each photo in a written log kept alongside the files
- Maintain a chain of custody by documenting every transfer: when you shared photos with your insurer, your attorney, or any third party
Pro Tip: When sharing photos with your insurance company or attorney, send copies, never originals. Keep the original files in their unmodified state on your own device and cloud storage. If the originals are ever challenged, you can produce them exactly as your phone captured them.
The chain of custody concept is straightforward: you need to be able to show that your photos have not been tampered with from the moment you took them to the moment they are presented as evidence. A log showing that photos were uploaded to Google Photos at 3:47 PM on the day of the accident and shared with your attorney two days later is a simple but powerful chain of custody record.
Common mistakes that weaken your photo evidence
The most damaging mistake you can make is moving your vehicle before photographing the scene. Failing to photograph important context, moving vehicles before photographing, or not backing up photos are the most common errors that weaken claim evidence. Each one is entirely preventable.
Watch out for these specific pitfalls:
- Moving vehicles first. If it is safe to leave vehicles in place, do so until you have completed your scene documentation. Repositioning a car destroys positional evidence.
- Too few photos or angles. Three photos of a damaged bumper from the same distance and angle give an adjuster almost nothing to work with. Vary your distance and position for every damaged area.
- Skipping context shots. A close-up of a dent tells half the story. Without a wide shot showing where that dent sits relative to the road, the other vehicle, and the surrounding environment, its evidentiary value drops sharply.
- Editing originals. Cropping a photo to remove a distracting background also removes GPS data and timestamps embedded in the file. Never edit originals.
- No backup. Phones get lost, stolen, or damaged after accidents. If your only copies of the photos are on a cracked phone screen, you may lose everything. Upload to cloud storage within the hour.
Pro Tip: Use the first 24 hours after the accident to photograph your injuries as well as your vehicle. Bruising and swelling often peak 24 to 48 hours after impact, making photos taken the next day even more compelling than those taken at the scene.
One overlooked mistake is failing to photograph the other driver’s vehicle thoroughly. Many people focus entirely on their own car and capture only one or two shots of the other vehicle. The other car’s damage pattern is direct evidence of the angle and force of impact, which directly supports your liability argument.
Why I tell every client: your phone is your most powerful tool at the scene
After more than a decade representing injured Coloradans and working as a former federal claims adjudicator, I have seen firsthand how photo documentation changes the outcome of a case. I have watched strong claims fall apart because a client moved their car before taking a single photo. I have also watched cases that looked difficult on paper settle favorably because a client had 22 well-organized, timestamped photos that told the story better than any witness could.
The uncomfortable truth is that insurance companies are not on your side at the moment of a claim. They are evaluating your evidence with a trained eye looking for gaps, inconsistencies, and reasons to reduce your payout. Thorough accident scene photography closes those gaps before the adjuster even opens your file.
What I find most striking is how few people treat photo documentation as a systematic process. Most take three or four shots of their car and stop. The clients who come to me with a full photo set, organized by category and backed up in the cloud, are in a fundamentally different position than those who do not. Their claims move faster, their settlements are higher, and their cases are easier to defend if litigation becomes necessary.
My advice is simple: before you call your insurance company, before you exchange information, before you do anything else, take photos. Walk the entire scene. Document everything you can see. Your phone camera is free, it is always with you, and it may be the single most valuable thing you use that day.
How Stubbornattorney uses your photos to fight for a full recovery
At Stubbornattorney, Ryan Malnar and the team know exactly how insurers evaluate photographic evidence because Ryan spent years as a federal claims adjudicator before becoming a personal injury attorney. That background means the firm reviews your accident photos the same way an insurer does, identifying strengths, closing gaps, and building the strongest possible case from your documentation. If you have been in a collision and want to understand how your photos support your claim, review common personal injury case examples to see how photo evidence has shaped real outcomes. Then reach out for a free case evaluation. The fight does not stop until you get what you deserve.
FAQ
What is the role of accident photos in an insurance claim?
Accident photos serve as objective visual evidence that verifies vehicle damage, establishes the scene, and supports liability determinations. Insurance adjusters use them to authorize repair estimates and assess fault before making any payment decision.
How many photos should I take after a car accident?
A structured set of 15 to 25 photos is the professional standard, covering scene shots, vehicle damage at wide, mid-range, and close-up distances, and identifying information like license plates and VINs. This range gives adjusters and attorneys everything they need without gaps.
Can editing or filtering my accident photos hurt my claim?
Yes. Altering or compressing photos removes EXIF metadata including timestamps and GPS coordinates, which are critical for establishing when and where damage occurred. Always preserve original, unedited files and share copies rather than originals.
Do injury photos matter as much as vehicle damage photos?
Injury photos alongside property damage photos provide crucial visual evidence that supports injury claims and strengthens settlement negotiations. Photographs of bruising or swelling taken in the 24 to 48 hours after impact are especially compelling because visible trauma often peaks during that window.
What is chain of custody and why does it matter for my photos?
Chain of custody is a documented record of who has accessed, transferred, or stored your photos from the moment they were taken. Maintaining this record prevents opposing parties from claiming your photos were tampered with, which protects their admissibility as evidence in court or during claims proceedings.